
Data as of Aug 25, 2026 · Based on 275 AI responses from ChatGPT and Google AI Overviews · See how Parse measures this
To effectively reduce noise and improve audio quality, use cloud-based AI tools like 


Brands AI recommends here
Named in 76% of answers
Named in 53% of answers
Named in 52% of answers
Named in 42% of answers
Source | Citation share |
|---|---|
 ElevenLabs — How to clean up high-quality podcastshttps://elevenlabs.io/blog/how-to-clean-up-audio-for-podcasts | 4.9% |
 Methods for Eliminating Podcast Background Noisehttps://bandbarracks.com/blog/methods-for-eliminating-podcast-background-noise/ | 3.7% |
 How to clean up audio and remove background noisehttps://www.izotope.com/en/learn/how-to-clean-up-audio-and-remove-background-noise | 2.9% |
 Podcast Editing 101: How to Remove Background Noisehttps://independentpodcast.network/training/podcast-editing-101-how-to-remove-background-noise/ | 2.8% |
 How to Improve Your Podcast Audio Quality - Podmod Bloghttps://podmod.ai/blog/how-to-improve-your-podcast-audio-quality | 2.6% |
 10 Easy Ways to Remove Background Noise from Your Podcast – Motion Beachhttps://motionbeach.com/blog/audio/10-easy-ways-to-remove-background-noise/ | 2.2% |
 How to Improve Your Podcast Audio Quality | Cue Productionshttps://www.cuepodcasts.com/post/improve-podcast-audio-quality | 2.0% |
 Improving Podcast Sound Quality: Tips, Tricks, and Experiences - Reddithttps://www.reddit.com/r/podcasting/comments/1d2gi8l/improving_podcast_sound_quality_tips_tricks_and/ | 1.8% |
How to Improve Podcast Sound Quality - Home Brew Audio – Home Recording Studiohttps://www.homebrewaudio.com/35955/improve_podcast_sound_quality_tips_techniques/ | 1.8% |
 How to Kill Background Noise When Recording a Podcasthttps://www.thepodcasthost.com/recording-skills/reduce-intermittent-background-noise-podcast-recordings/ | 1.7% |
Effectively removing background noise involves a mix of capturing "room tone" for software profiling (using tools like Audacity or Adobe Audition), applying noise gates to mute silence, and using AI tools like ElevenLabs or Adobe Podcast AI. The best results combine proper microphone technique (using dynamic mics)…
Effectively removing background noise involves a mix of capturing "room tone" for software profiling (using tools like Audacity or Adobe Audition), applying noise gates to mute silence, and using AI tools like ElevenLabs or Adobe Podcast AI. The best results combine proper microphone technique (using dynamic mics) with post-production noise reduction to eliminate hiss, hums, and traffic.
This video demonstrates how to use noise reduction tools in a podcast editing software:
 01:00
01:00Pre-Production: Prevent Noise
Post-Production: Cleaning Audio
80
−100
Hz
) to remove low-frequency rumble like traffic or HVAC systems.
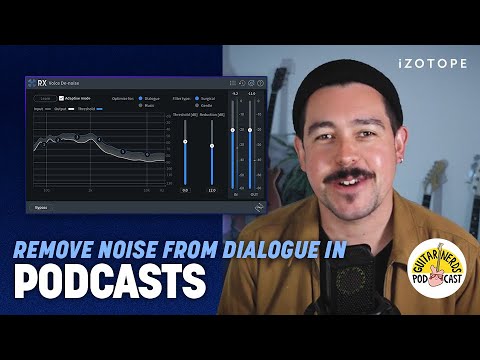
This video shows how to use iZotope RX10 to remove background noise from a podcast:
 47s
47sKey Tools for Audio Cleanup
Caution: Over-applying noise reduction can make voices sound robotic or hollow (artifacts). It is often better to have a tiny amount of natural background noise than to over-process the audio.
Improving podcast interview audio comes down to a combination of **good cleanup editing + smart processing order + (ideally) a cleaner recording upfront**. Here’s a practical workflow that works in tools like Audacity, Adobe Audition, Descript, or even AI enhancers. * * * ## 1\. Start with the cleanest possible source…
Improving podcast interview audio comes down to a combination of good cleanup editing + smart processing order + (ideally) a cleaner recording upfront. Here’s a practical workflow that works in tools like Audacity, Adobe Audition, Descript, or even AI enhancers.
Before editing:
Record in a quiet, soft room (curtains, carpet, couch help a lot)
Use a decent mic close to the mouth (6–12 inches)
Reduce room echo (blank walls = worst offender)
Turn off fans, AC, or anything constant and loud
Even the best noise reduction can’t fully “fix” bad recordings—if the voice is buried, cleanup will sound artificial or watery.
This is your core cleanup step.
Find a section where only noise is present (room tone)
Capture a “noise profile” / “noise print”
Apply noise reduction across the whole track
Typical tools:
Noise Reduction / Noise Print (Audacity, Adobe Audition)
Adaptive Noise Reduction (for changing noise like traffic or wind)
Key tip:
Don’t overdo it—too much reduction causes robotic or underwater voice artifacts. Start light (10–30%) and increase only if needed.
Noise reduction won’t handle everything.
Use editing tools to:
Remove loud bumps, chair squeaks, or mic hits
Lower or mute sections with sudden noise
Use spectral editing (if available) to “paint out” unwanted sounds
Adobe Audition-style tools like spectral view or healing brush are especially effective here
After cleaning noise:
High-pass filter around 70–100 Hz → removes rumble
Slight boost around 3–5 kHz → improves clarity
Reduce harsh frequencies (often 2–4 kHz or 7–9 kHz depending on voice)
Evens out volume differences between speakers
Makes interviews sound more “radio-like”
Set final loudness consistently (don’t let one speaker be louder)
Target common podcast loudness:
Around -16 LUFS (stereo) or -19 LUFS (mono)
This ensures consistent playback across headphones and apps.
Modern tools can dramatically help:
Adobe Podcast Enhance Speech
Descript Studio Sound
Auphonic
These can:
Reduce background noise
Improve vocal presence
Level multiple speakers automatically
But be careful—overuse can make voices sound synthetic.
Noise reduction ≠ echo removal.
If your room sounds “boxy” or reverby:
Noise reduction won’t fix it well
You need:
De-reverb tools (if available)
Or better recording environment next time
A solid order is:
Noise reduction (clean constant noise)
EQ (shape voice)
Compression (even dynamics)
De-esser (reduce harsh “s” sounds)
Normalize / loudness matching
Final polish (optional AI enhancement)
Overusing noise reduction → robotic voice
Boosting volume before cleanup → amplifies noise too
Trying to “fix echo” with noise filters
Skipping room treatment and relying only on software
If you tell me:
what software you’re using (Audacity, Adobe Audition, Descript, etc.)
and what kind of noise you’re dealing with (fan, echo, traffic, hiss)
I can give you a step-by-step exact settings workflow.
Improving podcast interview audio usually comes down to two goals: **(1) reducing constant background noise** (fans, hum, room tone) and **(2) improving voice clarity and balance**. The good news is you can get very clean results even from imperfect recordings if you follow a solid workflow. Here’s a practical, proven…
Improving podcast interview audio usually comes down to two goals: (1) reducing constant background noise (fans, hum, room tone) and (2) improving voice clarity and balance. The good news is you can get very clean results even from imperfect recordings if you follow a solid workflow.
Here’s a practical, proven approach used in podcast editing:
The most important rule: remove steady noise first, not everything at once.
AI tools (fastest option):
Tools like Adobe Podcast Enhance or similar AI denoisers can dramatically clean up interviews in one pass by isolating speech and suppressing background noise
Manual tools (more control):
In software like Audacity or Adobe Audition:
Find a “silent” section (room tone only)
Capture a noise profile
Apply gentle noise reduction across the track
Don’t try to remove 100% of the noise. That often causes “underwater” or robotic artifacts. Aim for reduction, not elimination.
If your interview sounds “roomy” or hollow, that’s reverb—not noise.
Fixes:
AI de-reverb tools (best option)
Recording environment treatment next time (closets, soft furniture, blankets)
Echo is harder to fix than background hum, so treat it early in the chain.
EQ is where audio starts sounding “professional.”
Basic settings:
High-pass filter at 80–100 Hz → removes rumble
Cut 200–400 Hz → reduces muddiness
Slight boost around 2–5 kHz → improves clarity
This alone can make voices sound much more “podcast-ready”
People naturally speak unevenly in interviews.
Compression helps:
Quiet speech becomes more audible
Loud parts don’t overwhelm
Good starting point:
Ratio: 2:1 to 4:1
Medium attack/release
This creates consistent “radio-style” audio.
Noise reduction won’t fix everything.
You still want to manually:
Cut coughs, chair squeaks, phone buzzes
Reduce background interruptions between speech
Use fades instead of hard cuts
This is where podcasts go from “edited” to “clean.”
A noise gate automatically lowers sound when nobody is speaking.
Good for:
Keyboard noise
Room hum between sentences
Be careful: set it too aggressively and it will chop words.
Before publishing:
AI or manual noise reduction
De-reverb (if needed)
EQ cleanup
Compression
Manual editing (cuts & cleanup)
Noise gate (optional)
Loudness normalization
Overusing noise reduction (causes robotic voice)
Skipping room treatment during recording
Fixing everything in one plugin instead of step-by-step processing
Not using good headphones during editing
Tell me:
what you recorded on (Zoom, phone, mic model, etc.)
what software you’re using (Audacity, Adobe Audition, Descript, etc.)
I can give you a very specific step-by-step preset workflow for your exact situation.
Effectively removing background noise and enhancing podcast audio involves a mix of proper recording techniques and post-production, including using AI tools (e.g., Adobe Podcast AI, [ElevenLabs](https://elevenlabs.io/blog/how-to-clean-up-audio-for-podcasts)) or spectral editing. Prioritize recording in a quiet,…
Effectively removing background noise and enhancing podcast audio involves a mix of proper recording techniques and post-production, including using AI tools (e.g., Adobe Podcast AI, ElevenLabs) or spectral editing. Prioritize recording in a quiet, soft-furnished room (e.g., a closet) and using a dynamic microphone with a pop filter to prevent noise.
Pre-Production: Preventing Noise
Post-Production: Cleaning and Enhancement
Recommended Software
Improving podcast interview audio comes down to two things: **fixing the recording at the source** and **cleaning it properly in post-production**. You’ll get the best results by combining both, because no amount of editing can fully rescue a badly recorded track. Here’s a practical, workflow-based approach that works…
Improving podcast interview audio comes down to two things: fixing the recording at the source and cleaning it properly in post-production. You’ll get the best results by combining both, because no amount of editing can fully rescue a badly recorded track.
Here’s a practical, workflow-based approach that works for most podcast setups:
Even great noise reduction tools struggle if the original audio is messy.
Record in a quiet, soft room (carpets, curtains, closets help absorb echo)
Keep microphones 6–12 inches from the mouth with a slight off-axis angle to reduce plosives
Use closed-back headphones so you can catch hums or buzz in real time
Set levels so peaks stay around -12 to -6 dB (avoids distortion and keeps noise lower)
If you get this right, everything downstream becomes easier.
Don’t jump straight into heavy processing.
In your editing software (Audacity, Adobe Audition, Descript, etc.):
Cut out:
long pauses
filler words
coughs, chair squeaks, interruptions
Split noisy sections and handle them separately
Replace gaps with “room tone” (background silence from the same recording)
This keeps the audio natural and avoids over-processing artifacts
This is where most people overdo it.
Find a “noise profile” (a section where no one is speaking)
Apply gentle noise reduction in small amounts
Audacity Noise Reduction (free, basic but effective)
Adobe Audition “Noise Reduction / DeNoise”
iZotope RX (industry standard, most powerful)
Over-aggressive settings cause:
robotic voices
“underwater” artifacts
hollow, unnatural speech
Once noise is reduced, audio often sounds thin or dull.
Do this next:
High-pass filter at ~80–100 Hz (removes rumble)
Slight cut around 200–400 Hz (reduces muddiness)
Small boost around 2–5 kHz (improves clarity)
Smooths volume differences between speakers
Makes the conversation sound more consistent
If you still have issues:
De-hum tools for electrical buzz (50/60 Hz tones)
De-click / de-plosive tools for mouth sounds
Spectral editing (best for isolating specific noises like sirens or chair squeaks)
Advanced tools like iZotope RX are especially good here
Before publishing:
Normalize loudness (commonly around -16 LUFS for podcasts)
Check consistency across speakers
Export in high-quality WAV or high-bitrate MP3 (at least 128–192 kbps)
Don’t try to “erase everything.”
A little consistent background noise is better than:
warbling audio
robotic voices
unnatural artifacts
Listeners prefer natural + slightly imperfect over heavily processed sound
Record clean audio
Cut mistakes and unwanted sections
Apply gentle noise reduction
EQ + compression for clarity
Fix specific issues (hum, clicks)
Normalize and export
If you want, tell me what software you’re using (Audacity, Adobe Audition, Descript, etc.) and I can give you a step-by-step setup tailored to it.
Effectively remove podcast background noise by using AI tools like Adobe Podcast AI or [ElevenLabs](https://elevenlabs.io/blog/how-to-clean-up-audio-for-podcasts) for instant cleaning. For manual editing, use [Audacity's](https://support.audacityteam.org/repairing-audio/noise-reduction-removal) "Noise Reduction"…
Effectively remove podcast background noise by using AI tools like Adobe Podcast AI or ElevenLabs for instant cleaning. For manual editing, use Audacity's "Noise Reduction" effect by creating a noise profile from silent sections, or use iZotope RX for professional spectral repair. Prioritize using dynamic microphones and proper mic technique to minimize noise during recording.
Top Techniques for Audio Improvement
This video demonstrates how to use the noise reduction tool in Audacity:
 59s
59sPreventative Measures (Best Practices)
Improving podcast interview audio is mostly about combining **good cleanup tools with careful, light processing**. The goal is to reduce noise without making voices sound “watery” or artificial. Here’s a practical workflow that works for most podcast setups: * * *
Improving podcast interview audio is mostly about combining good cleanup tools with careful, light processing. The goal is to reduce noise without making voices sound “watery” or artificial.
Here’s a practical workflow that works for most podcast setups:
Before editing, you’ll get the biggest improvement from recording quality:
Use a dynamic microphone (it rejects room noise better than condenser mics)
Record in a quiet, soft room (blankets, curtains, closets help)
Keep mic close (6–8 inches) to increase voice vs. noise ratio
Turn off fans/AC if possible
Even the best software can’t fully fix bad recordings—this step matters more than anything else.
This is your main cleanup step.
iZotope RX (Voice De-noise / Spectral De-noise)
Adobe Audition (Noise Reduction process)
Free option: Audacity Noise Reduction
Find a section of “silence” (room noise only)
Capture a noise print/profile
Apply gentle reduction (not aggressive)
These need manual or spectral editing , not general noise reduction:
Use spectral editing tools (RX is best here)
Zoom in and remove or reduce specific noise events
Tools like:
De-click / De-crackle (mouth sounds, pops)
Spectral Repair (short unwanted sounds)
This is where professional-sounding podcasts stand out.
After noise cleanup:
EQ
High-pass filter around 70–100 Hz (removes rumble)
Slight boost around 2–5 kHz (speech clarity)
Compression
Evens out volume differences between speakers
Use moderate settings (don’t squash dynamics)
De-esser
Reduces harsh “S” sounds
A very common podcast issue is uneven levels.
Normalize or use loudness targeting:
Aim around -16 LUFS (stereo podcasts) or -19 LUFS (mono)
Tools like Auphonic , Adobe Audition, or RX can automate this.
After removing noise between sentences:
Add a subtle layer of room tone
Prevents unnatural cut-in/cut-out sound
If you want faster results:
Adobe Podcast Enhance Speech (quick cleanup, but sometimes artificial)
Auphonic (great for leveling + noise handling)
iZotope RX Repair Assistant (semi-automatic workflow)
Overusing noise reduction → voice sounds underwater
Cutting all background noise → unnatural silence
Heavy EQ instead of proper noise removal
Not matching loudness between speakers
If you want a clean repeatable process:
Noise reduction (light)
Spectral cleanup (manual fixes)
EQ
Compression
Level matching (LUFS)
Final listen on headphones + phone speaker
If you tell me what tools you’re using (Audacity, Adobe Audition, DaVinci Resolve, etc.), I can give you a more exact step-by-step tailored workflow.
Effectively removing background noise from podcast interviews involves capturing a "noise profile" in editing software (like [Audacity's](https://support.audacityteam.org/repairing-audio/noise-reduction-removal) "Get Noise Profile") to apply noise reduction, or using AI tools like Adobe Podcast AI or [11…
Effectively removing background noise from podcast interviews involves capturing a "noise profile" in editing software (like Audacity's "Get Noise Profile") to apply noise reduction, or using AI tools like Adobe Podcast AI or 11 Labs voice isolator for instant cleaning. Prioritize using dynamic microphones and setting proper gain levels (peaking at -12 to -6 dB) to minimize noise during recording.
Best Practices for Background Noise Removal:
Improving Audio Quality During Recording:
Common Pitfalls to Avoid:
To effectively remove background noise and improve podcast audio, use specialized software like [iZotope RX](https://www.izotope.com/en/learn/how-to-clean-up-audio-and-remove-background-noise) (voice de-noise) or Adobe Podcast AI for automatic repair. Essential steps include capturing a "noise print" in Audacity or…
To effectively remove background noise and improve podcast audio, use specialized software like iZotope RX (voice de-noise) or Adobe Podcast AI for automatic repair. Essential steps include capturing a "noise print" in Audacity or Adobe Audition to create a noise profile, applying a noise gate to mute silent sections, and using high-pass filters to remove low-frequency hums.
Key Techniques for Cleaner Audio:
Recommended Tools:
This video shows how to use noise reduction in Audacity:
47sFor optimal results, ensure the noise reduction is applied early in the editing chain before heavy compression.
Cleaning up a podcast interview is a mix of **smart recording habits** and **careful post-production**. You can’t always _fully_ remove background noise—but you can reduce it to the point where listeners barely notice it and your voices sound clear and professional. Here’s a practical, effective workflow used by most…
Cleaning up a podcast interview is a mix of smart recording habits and careful post-production. You can’t always fully remove background noise—but you can reduce it to the point where listeners barely notice it and your voices sound clear and professional.
Here’s a practical, effective workflow used by most podcasters:
The core technique is noise profiling :
Find 2–5 seconds of pure background noise (no speech)
Use your editor’s noise reduction tool (e.g., Audacity, Adobe Audition)
Apply moderate reduction (typically 6–12 dB)
👉 Key tip:
Heavy noise reduction creates “underwater” or metallic voices. It’s better to leave a little noise than ruin clarity.
Low-frequency noise (AC, traffic, mic handling) sits below your voice:
Apply a high-pass filter around 80–100 Hz
This instantly cleans up muddiness without affecting speech much
Different noise types need different tools:
Hum (electrical buzz) → notch filter
Clicks/pops → de-click tool or manual editing
Sibilance (“S” sounds) → de-esser
Echo/reverb → de-reverb (limited but useful)
A multi-step workflow (instead of one big fix) gives cleaner results.
After cleanup, shape the voice:
Cut 80–120 Hz → removes rumble
Slightly boost 3–5 kHz → adds clarity/presence
Reduce 200–400 Hz if it sounds “boxy”
👉 Keep EQ subtle—small adjustments make a big difference.
Interviews often have uneven levels between speakers:
Ratio: ~2:1 to 4:1
Smooths loud/quiet differences
Makes the conversation easier to listen to everywhere
Target around −16 LUFS (stereo podcasts)
Ensures consistent volume across episodes and platforms
Instead of one aggressive edit:
Do small adjustments in stages
Listen after each step
This avoids artifacts and keeps voices natural.
The biggest quality boost happens before editing :
Record in a quiet, soft-furnished room
Keep mic 6–12 inches from mouth
Record separate tracks for each speaker
Capture 30–60 seconds of room tone for noise profiling
Beginner: Audacity (free)
Intermediate: Adobe Audition
Advanced: iZotope RX (industry standard)
AI tools: vocal isolation/cleanup tools can speed things up
If you want a quick repeatable chain:
Noise reduction (light)
High-pass filter
Remove hum/clicks
EQ (clarity tweaks)
Compression
De-esser
Loudness normalization
You’re aiming for clear, natural voices—not perfectly silent audio.
Listeners tolerate a bit of consistent background noise—but they immediately notice distorted or overprocessed voices.
If you tell me what software you’re using (Audacity, Premiere, GarageBand, etc.), I can give you exact step-by-step settings tailored to it.